 I have always loved growing my own vegetables in my garden. I enjoy the whole process from start to finish. Preparing the soil early in the season, planting the seeds or seedlings, watching them grow slowly, weeding, and harvesting! For me, there is no comparison between homegrown and store bought vegetables. Homegrown tastes so much better, even though they often don’t look as perfect!
Over the years though, I have slowly turned my attention to herbs. I find that I get a much bigger return on my investment if I grow fresh herbs instead of vegetables. You can grow a lot of fresh herbs in a small space, and thus grow enough herbs to last you for the entire summer without having to buy any at the store. And whatever I don’t use fresh during the summer, I dry and store for the colder season! It also provides the enormous advantage that you know exactly what goes into your herb and spices mix!
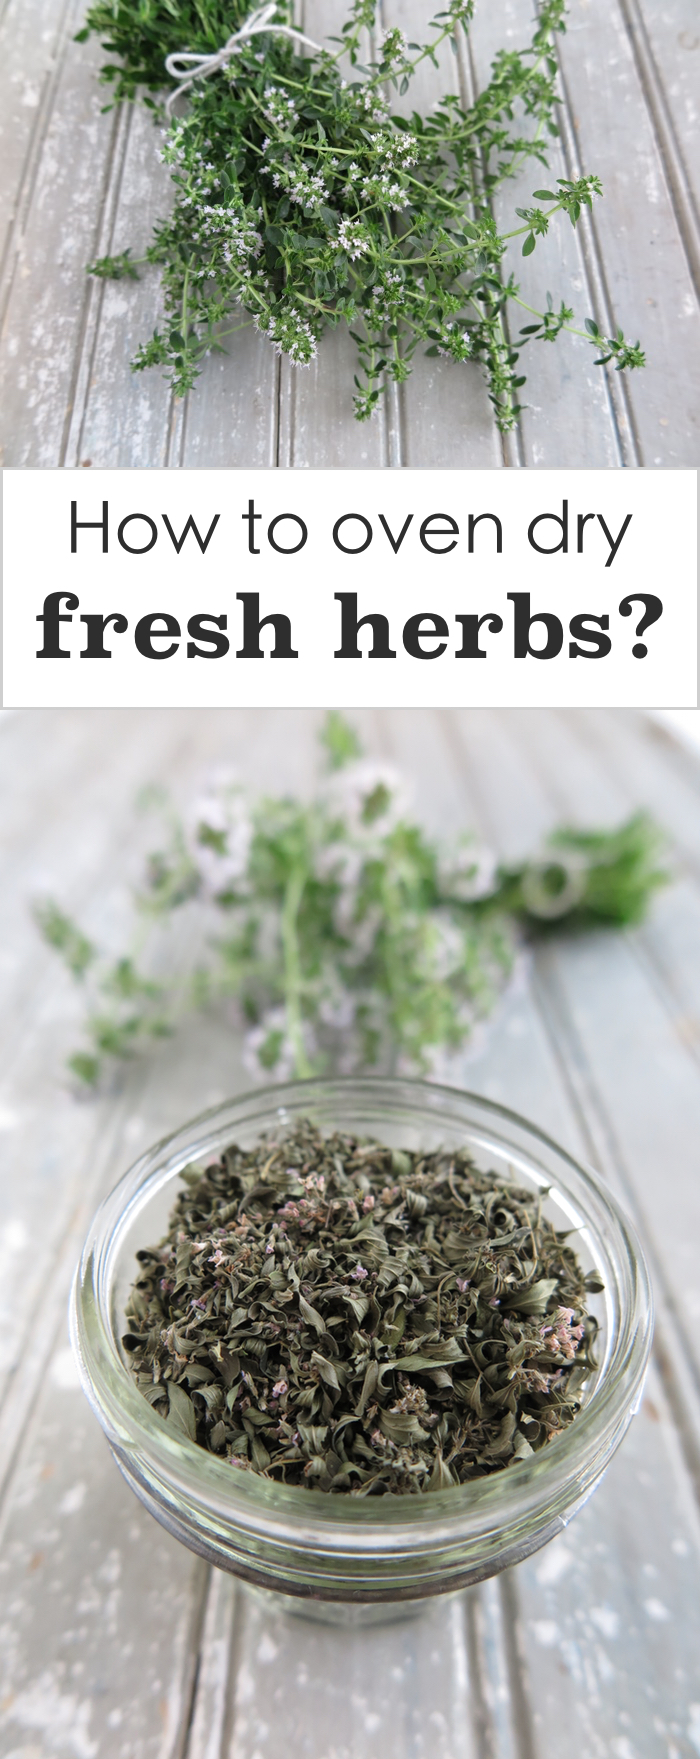
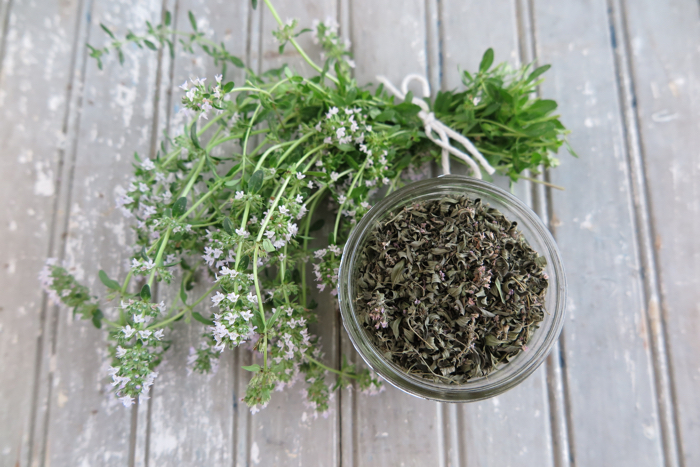
Drying your own herbs is an easy process. There are several techniques (including hanging bunches of fresh herbs upside-down in a cool, dry place), but I prefer to use the oven. It is much faster and I can process a larger quantity in less time than air drying. In the pictures, I am showing you how to oven dry fresh thyme, but the process can be used for any fresh herb such as sage, rosemary, oregano, tarragon, mint, etc.
When to harvest fresh herbs to dry? You can harvest at any stage of the plant’s growing season. As you can see in the pictures, my thyme has little pink-purple flowers! That’s because I was a little bit late harvesting this year. But that’s ok. In fact, thyme flowers are edible and, when dried, add a sweet little touch of color to the mix!
 The drying processing.
After you have cut the plants, remove any dead leaves or little spiders who like to nest in fragrant herbs! I usually don’t wash the herbs I grow, unless they are muddy (which is rarely the case in Colorado!) or if they have too many little insects (I often get teeny tiny flies in my thyme). As a rule, I prefer not to wash though as it does remove some of the water-soluble vitamins and volatile oils from the plant.
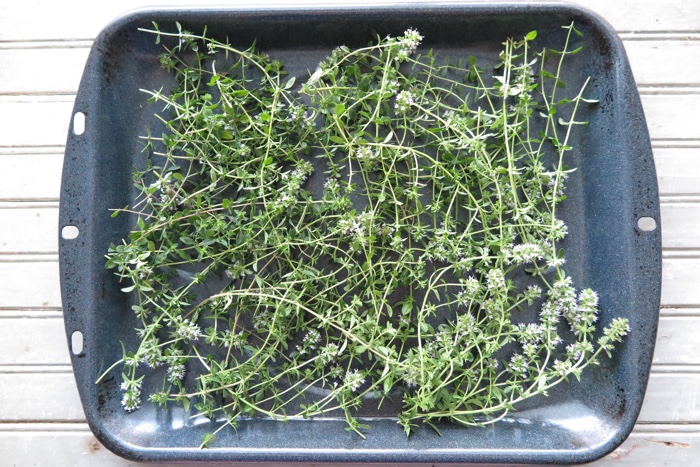
In any case, make sure the herbs are completely dry before putting them in the oven. If the plants are still humid, it will lengthen considerably the drying time. You can dry them between sheets of paper towel, or use a salad spinner. When that is taken care of, spread the herbs on a baking sheet or the bottom part of a broiler pan in a single, thin layer. Less is better when it comes to drying herbs because you want the dry air to circulate easily in between the plants.
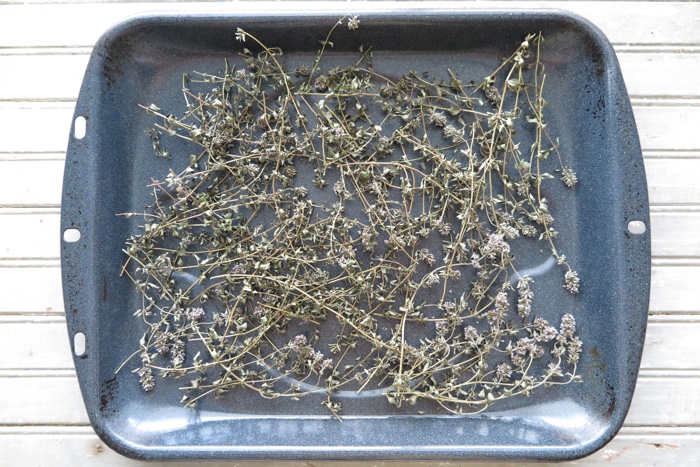
Set the oven to 175° F and place the pan in the middle of the oven. Important: leave the door of the oven slightly ajar to allow the heat to circulate. If you keep the door closed, it will cook the herbs instead of drying them! For a batch of thyme, I leave them in the oven for 2 hours. The drying time may vary slightly for other herbs.
 How do you know if the herbs are completely dry and ready? You have to test the herbs for dryness. When fully dry, they will be brittle and make a snapping sound when they are crushed. Once again, it takes me 2 hours to completely air dry a batch of thyme in my oven, but that may differ slightly for you.
 Once the herbs are dry, I crush them with my hands so that all the little leaves collect into the pan. Discard the hard stems. At this point, you have to decide if you prefer to just keep the leaves roughly crushed or if you want to ground them. Be aware though that grounded herbs have a shorter shelf life than crushed herbs. I personally prefer to lightly crush the leaves; I like the texture and appearance better. If you decide to ground them, you can do so with a mortar and a pestle, or in your food processor.
How to store dry herbs?
Store dry herbs in a clean, airtight glass jar or container, away from direct sunlight. Paper containers that can be tapped close are good as well. Plastic and metal containers (except stainless steel) are unsuitable. If you wish to store the herbs in a decorative tin, line them first with a paper bag!
Properly stored herbs will keep up to one year. If you notice that the herbs have lost their scent, it is time to prepare a new batch!
 To learn more about herbs and spices, check out this book. For a complete list of AIP herbs and spices, click here.


Thanks for the informative article! Why is a metal container sans lining unsuitable for storing dried herbs?
It is not recommended as delicate herbs sometimes can have a slight metallic taste when stored in tin containers (such as chamomile). But definitely a better option than plastic containers. I hope this helps! – Sophie